

Table of Contents
- Understanding Plant Topping: What It Is and Why It Matters
- Topped Plant vs Non Topped: Comparing Growth Patterns
- When to Top Your Plants: Timing for Success
- How to Top a Plant: Step-by-Step Guide
- After Topping: Essential Care for Optimal Recovery
- Advanced Topping Techniques for Experienced Growers
- Maximizing the Benefits: Getting the Most from Topped Plants
How to Top Plants: A Guide to Enhancing Growth and Yield
Topping plants is a high-impact cultivation technique that can dramatically improve your growing results. By removing the main growth tip, you encourage plants to develop multiple colas instead of focusing energy on a single central stem. This process creates bushier plants with increased yield potential and better light penetration. Whether you're growing ornamentals, vegetables, or cannabis, understanding how to top a plant properly can transform your cultivation outcomes.
Understanding Plant Topping: What It Is and Why It Matters
Topping is a form of high-stress training that involves cutting off the top of the main stem to redirect growth energy. When you remove the top of a plant, you interrupt the production of auxins (growth hormones) that normally concentrate in the uppermost growth tip. This hormonal disruption forces the plant to develop new growth points, resulting in multiple main stems instead of just one.
The benefits of proper topping include:
- Increased yield potential through multiple colas
- Better light penetration to lower growth sites
- Improved airflow throughout the canopy
- More efficient use of growing space
- Enhanced control over plant height
Mastering the topping technique requires understanding both when and how to make your cuts for optimal results.
Topped Plant vs Non Topped: Comparing Growth Patterns
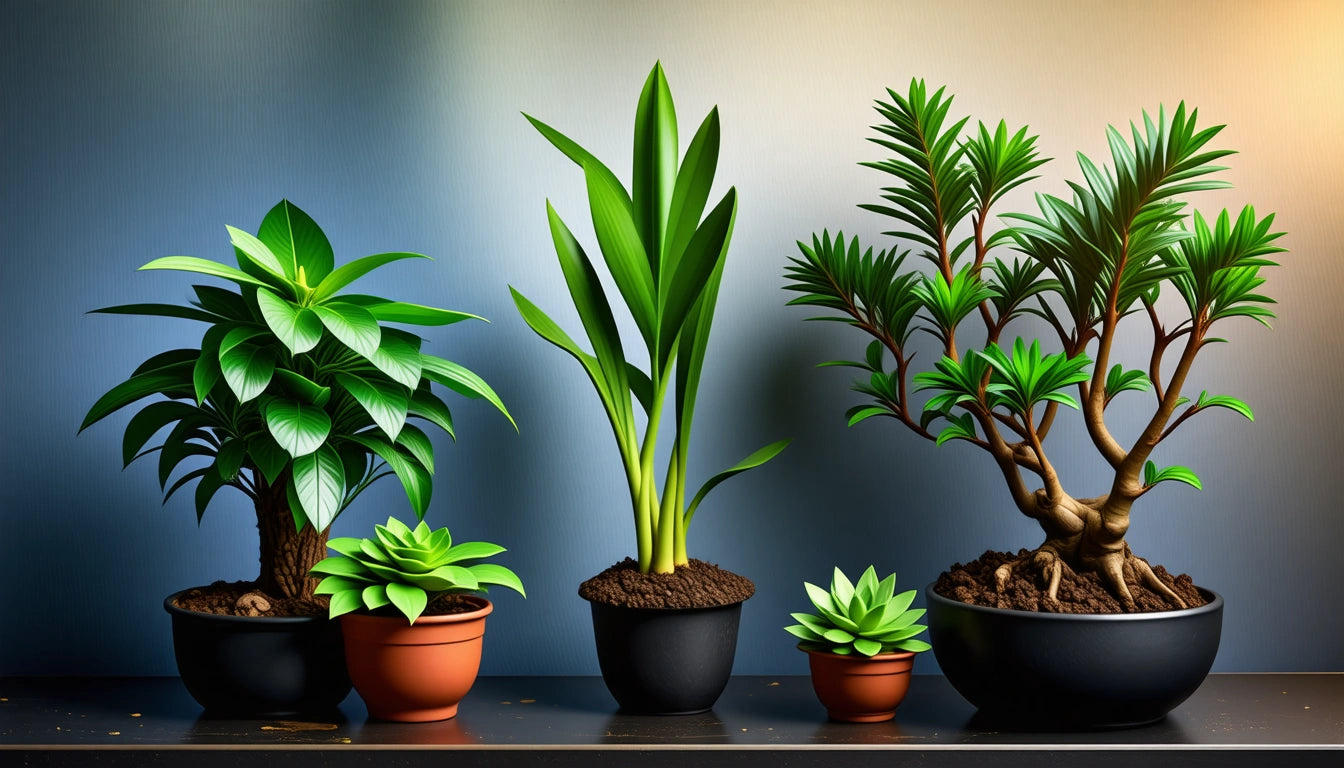
The difference between topped and non-topped plants becomes evident within weeks of applying the technique. Non-topped plants typically grow taller with a Christmas tree-like structure, focusing energy on a single main cola. The top of flower development is concentrated at the highest point, with secondary buds forming along the main stem but receiving less energy and light.
In contrast, topped plants develop a bushier, more horizontal growth pattern with multiple main colas of similar size and potency. The topped plant vs non topped outdoors comparison becomes even more dramatic, as outdoor plants have more space to expand laterally after topping.
Key Differences in Structure:
- Non-topped plants: Taller, vertical growth with one dominant cola
- Topped plants: Shorter, wider growth with multiple colas of similar size
When to Top Your Plants: Timing for Success
Timing is crucial when deciding how to top your pot plant or any other plant species. The general rule is to wait until your plant has developed 4-6 nodes (sets of leaves) before making your first topping cut. At this stage, the plant is established enough to handle the stress while still being young enough to respond vigorously with new growth.
Perfect timing for topping depends on several factors:
- Plant variety and genetics
- Overall plant health and vigor
- Growing conditions and environment
- Your specific goals for size and yield
For most plants, the sweet spot falls between 3-4 weeks after germination, but always prioritize node count over calendar age. The top leaves should be fully developed, and the stem should be thick enough to recover quickly from the cut.
How to Top a Plant: Step-by-Step Guide
Learning how to top plants properly involves more than just making a cut. Follow these steps for successful topping:
1. Prepare Your Tools
Start with clean, sharp scissors or pruning shears. Sterilize your cutting tool with isopropyl alcohol to prevent introducing pathogens to the fresh cut. When working with valuable plants, proper safety measures like secure storage containers with child-resistant lids for your tools and nutrients can prevent accidents and contamination in your growing area.
2. Identify the Correct Cutting Point
Locate the main stem and count the nodes from bottom to top. The ideal cutting point is above the 4th or 5th node, depending on your plant's overall health and vigor. You'll be removing the top of the plant, including the newest growth at the apex.
3. Make a Clean Cut
Cut the main stem just above the node where two new shoots are emerging. Make a clean, 45-degree angle cut to promote healing and prevent water accumulation on the cut surface. Avoid crushing or tearing the stem, as this can introduce infection or slow recovery.
4. Monitor Recovery
After topping, the plant will need time to recover before resuming vigorous growth. The top leaf sites will begin transforming into new main colas within days, with visible new growth appearing within a week under optimal conditions.
Optimal techniques for cannabis plants follow these same principles but may include additional considerations specific to that plant type.
After Topping: Essential Care for Optimal Recovery
The days following topping are critical for plant recovery and future development. Here's how to care for your newly topped plants:
- Lighting: Maintain consistent light schedules but consider reducing intensity slightly for 24-48 hours after topping
- Watering: Keep soil moist but not saturated; avoid overwatering which can stress the recovering plant
- Nutrients: Hold off on heavy feeding for 2-3 days, then resume normal feeding schedule
- Environment: Maintain stable temperature and humidity to minimize additional stressors
Most plants will show signs of recovery within 2-3 days, with new growth directions becoming evident within a week. The top of the plant will transform as two new main shoots develop from the nodes immediately below your cut.
Advanced Topping Techniques for Experienced Growers
Once you've mastered basic topping, you can explore more advanced techniques:
FIM Technique ("F**k, I Missed")
Instead of removing the entire top, the FIM technique involves pinching or cutting approximately 75% of the newest growth at the top. This creates even more tops than traditional topping, often resulting in 4+ new growth sites instead of just 2.
Mainlining/Manifolding
This technique combines topping with strategic pruning to create symmetrical plants with evenly distributed growth energy. The goal is to create a plant with a specific number of main colas (usually 8, 16, or 32) that are all of equal size and height.
Sequential Topping
After the initial topping and recovery, each of the resulting new tops can be topped again to multiply the number of colas further. This can be repeated several times, though returns diminish with each subsequent topping.
Special considerations for autoflowering varieties apply when using these advanced techniques, as their fixed lifecycle requires more careful timing.
Maximizing the Benefits: Getting the Most from Topped Plants
To fully capitalize on the advantages of topping, integrate these practices into your overall cultivation strategy:
- Combine topping with low-stress training (LST) to further control canopy development
- Adjust feeding schedules to support the increased number of growth sites
- Consider plant spacing needs, as topped plants grow wider than non-topped ones
- Monitor the top leaves for signs of stress or nutrient deficiencies that might impair new growth
- Document your results with different varieties to refine your approach over time
The most successful growers view topping not as an isolated technique but as part of a comprehensive approach to plant training and management. By understanding how the top of a plant influences overall development, you can make informed decisions about when and how to intervene for optimal results.
Whether you're growing for personal enjoyment or commercial production, mastering how to top plants effectively will significantly enhance your cultivation outcomes, providing bushier plants, better light utilization, and ultimately, improved yields.
Leave a comment
All comments are moderated before being published.
This site is protected by hCaptcha and the hCaptcha Privacy Policy and Terms of Service apply.